The purpose of this article is to guide you through preparing a Linux system to build and flash ATMEGA AVR microcontrollers. Using Ubuntu 22.04 and Fedora 39, I will demonstrate how to perform the compilation and flash an AVR MCU.
Installing the required packages
Support for 8-bit AVR MCUs has been available in free software for many years, and these tools are accessible in Linux repositories. We can install the necessary packages using the package manager.
- Install packages related to C development and the AVR compiler:
sudo apt install -y gcc build-essential sudo apt install -y avr-libc binutils-avr gcc-avr gdb-avr - Install avrdude, the flasher software.
sudo apt install -y libusb-dev avrdude
Configuring hardware
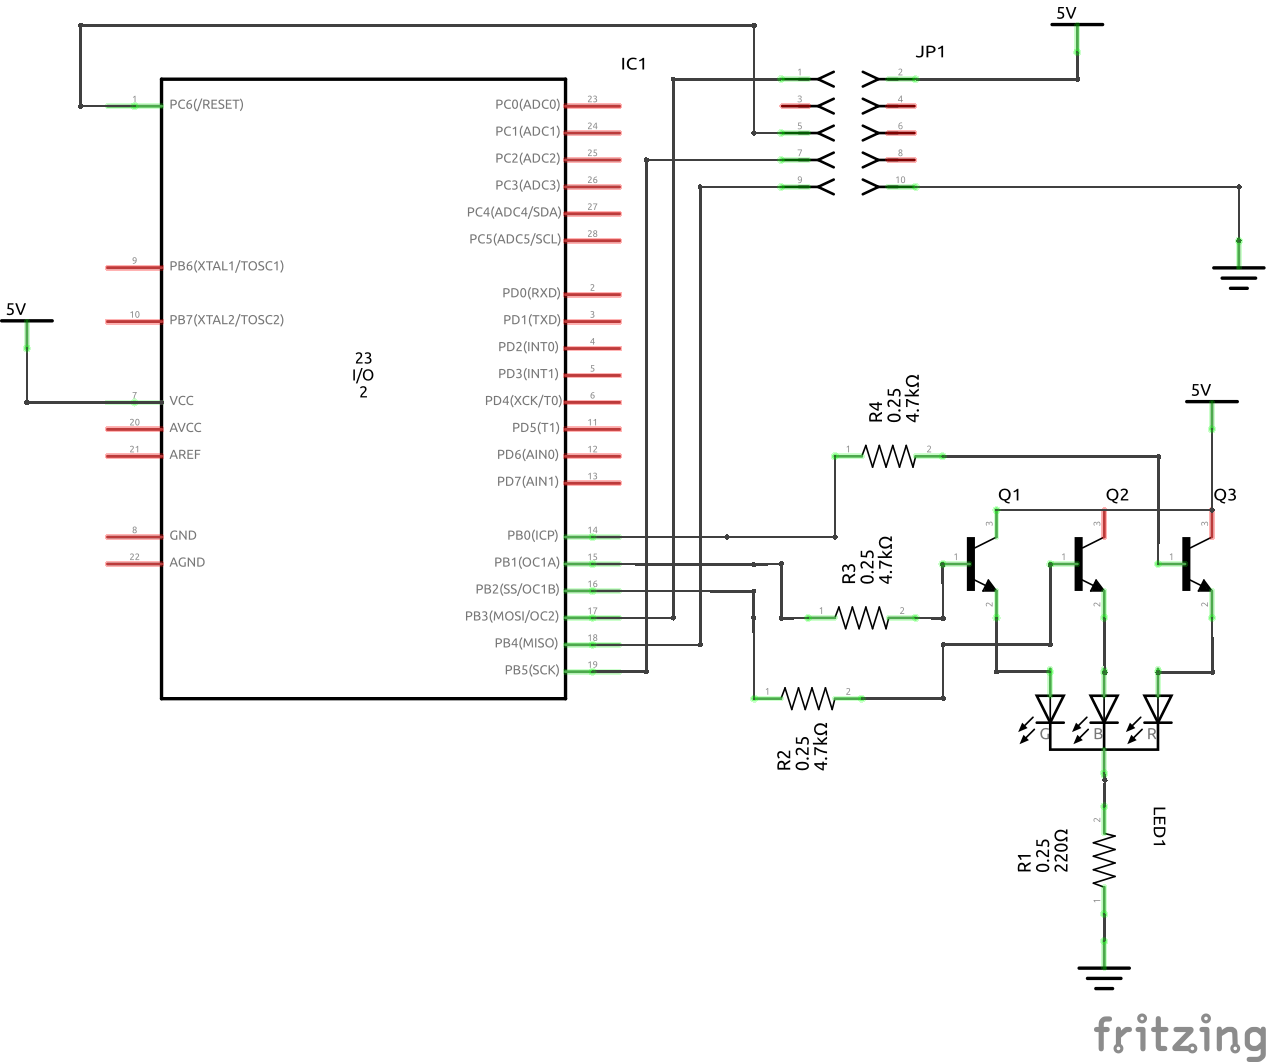
If you do not have enough experience with microcontrollers and hardware, this step may be a bit difficult. For this example, I used some transistors and resistors as switches. The following image shows the schematic of the circuit, and the connector corresponds to a USBAsp programmer. I bought the programmer on Aliexpress.
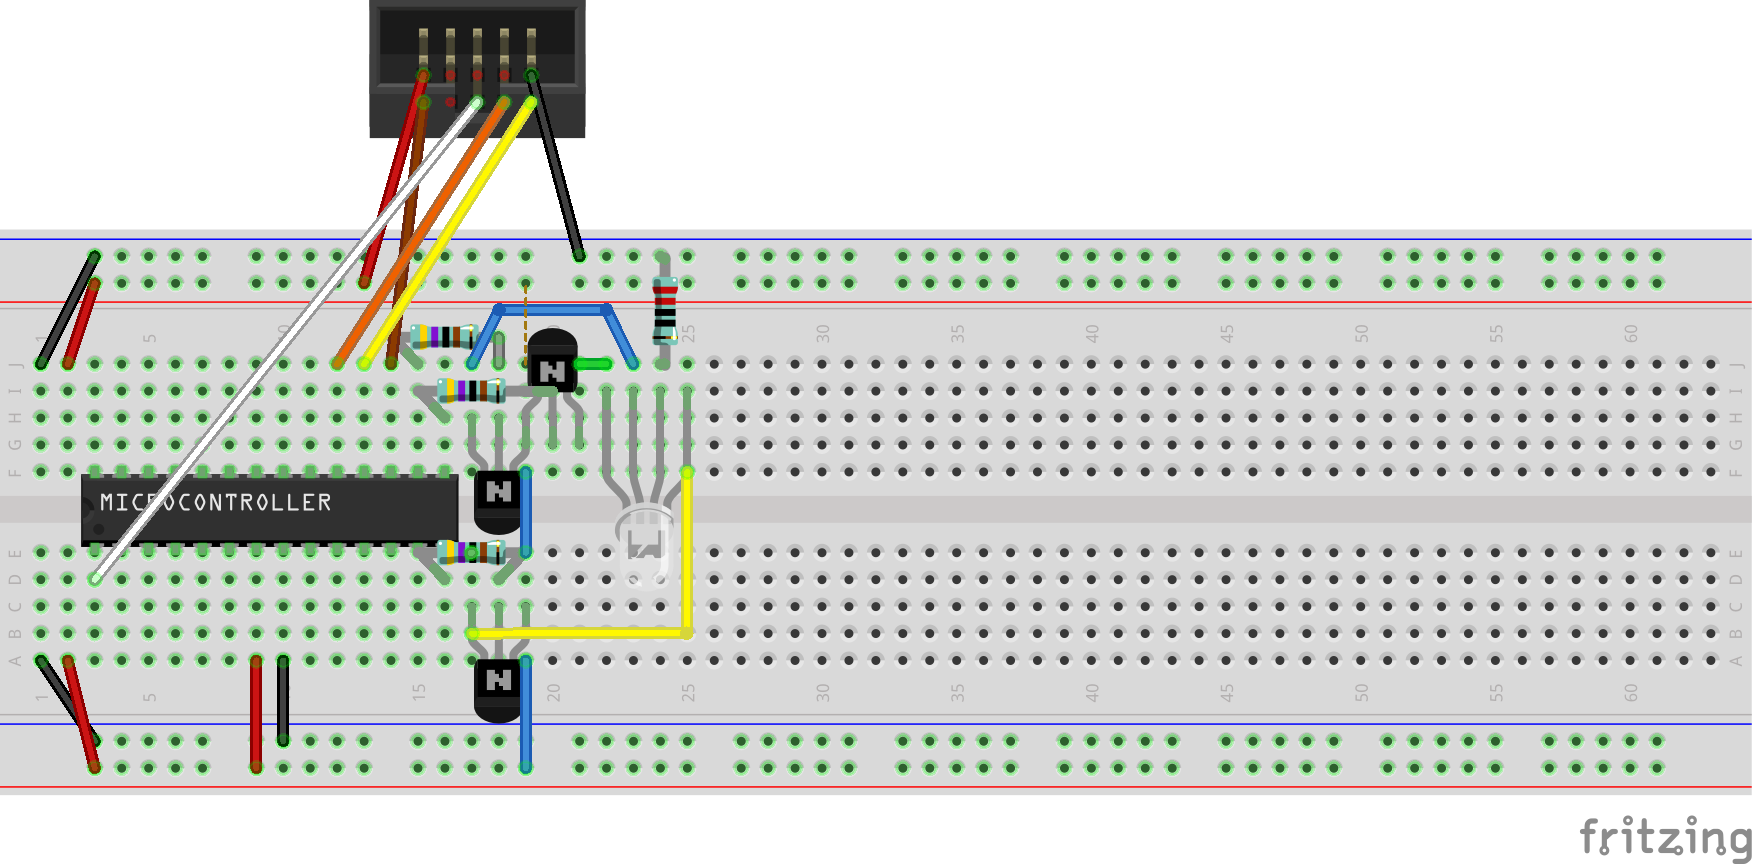
The view on the breadboard looks like this:
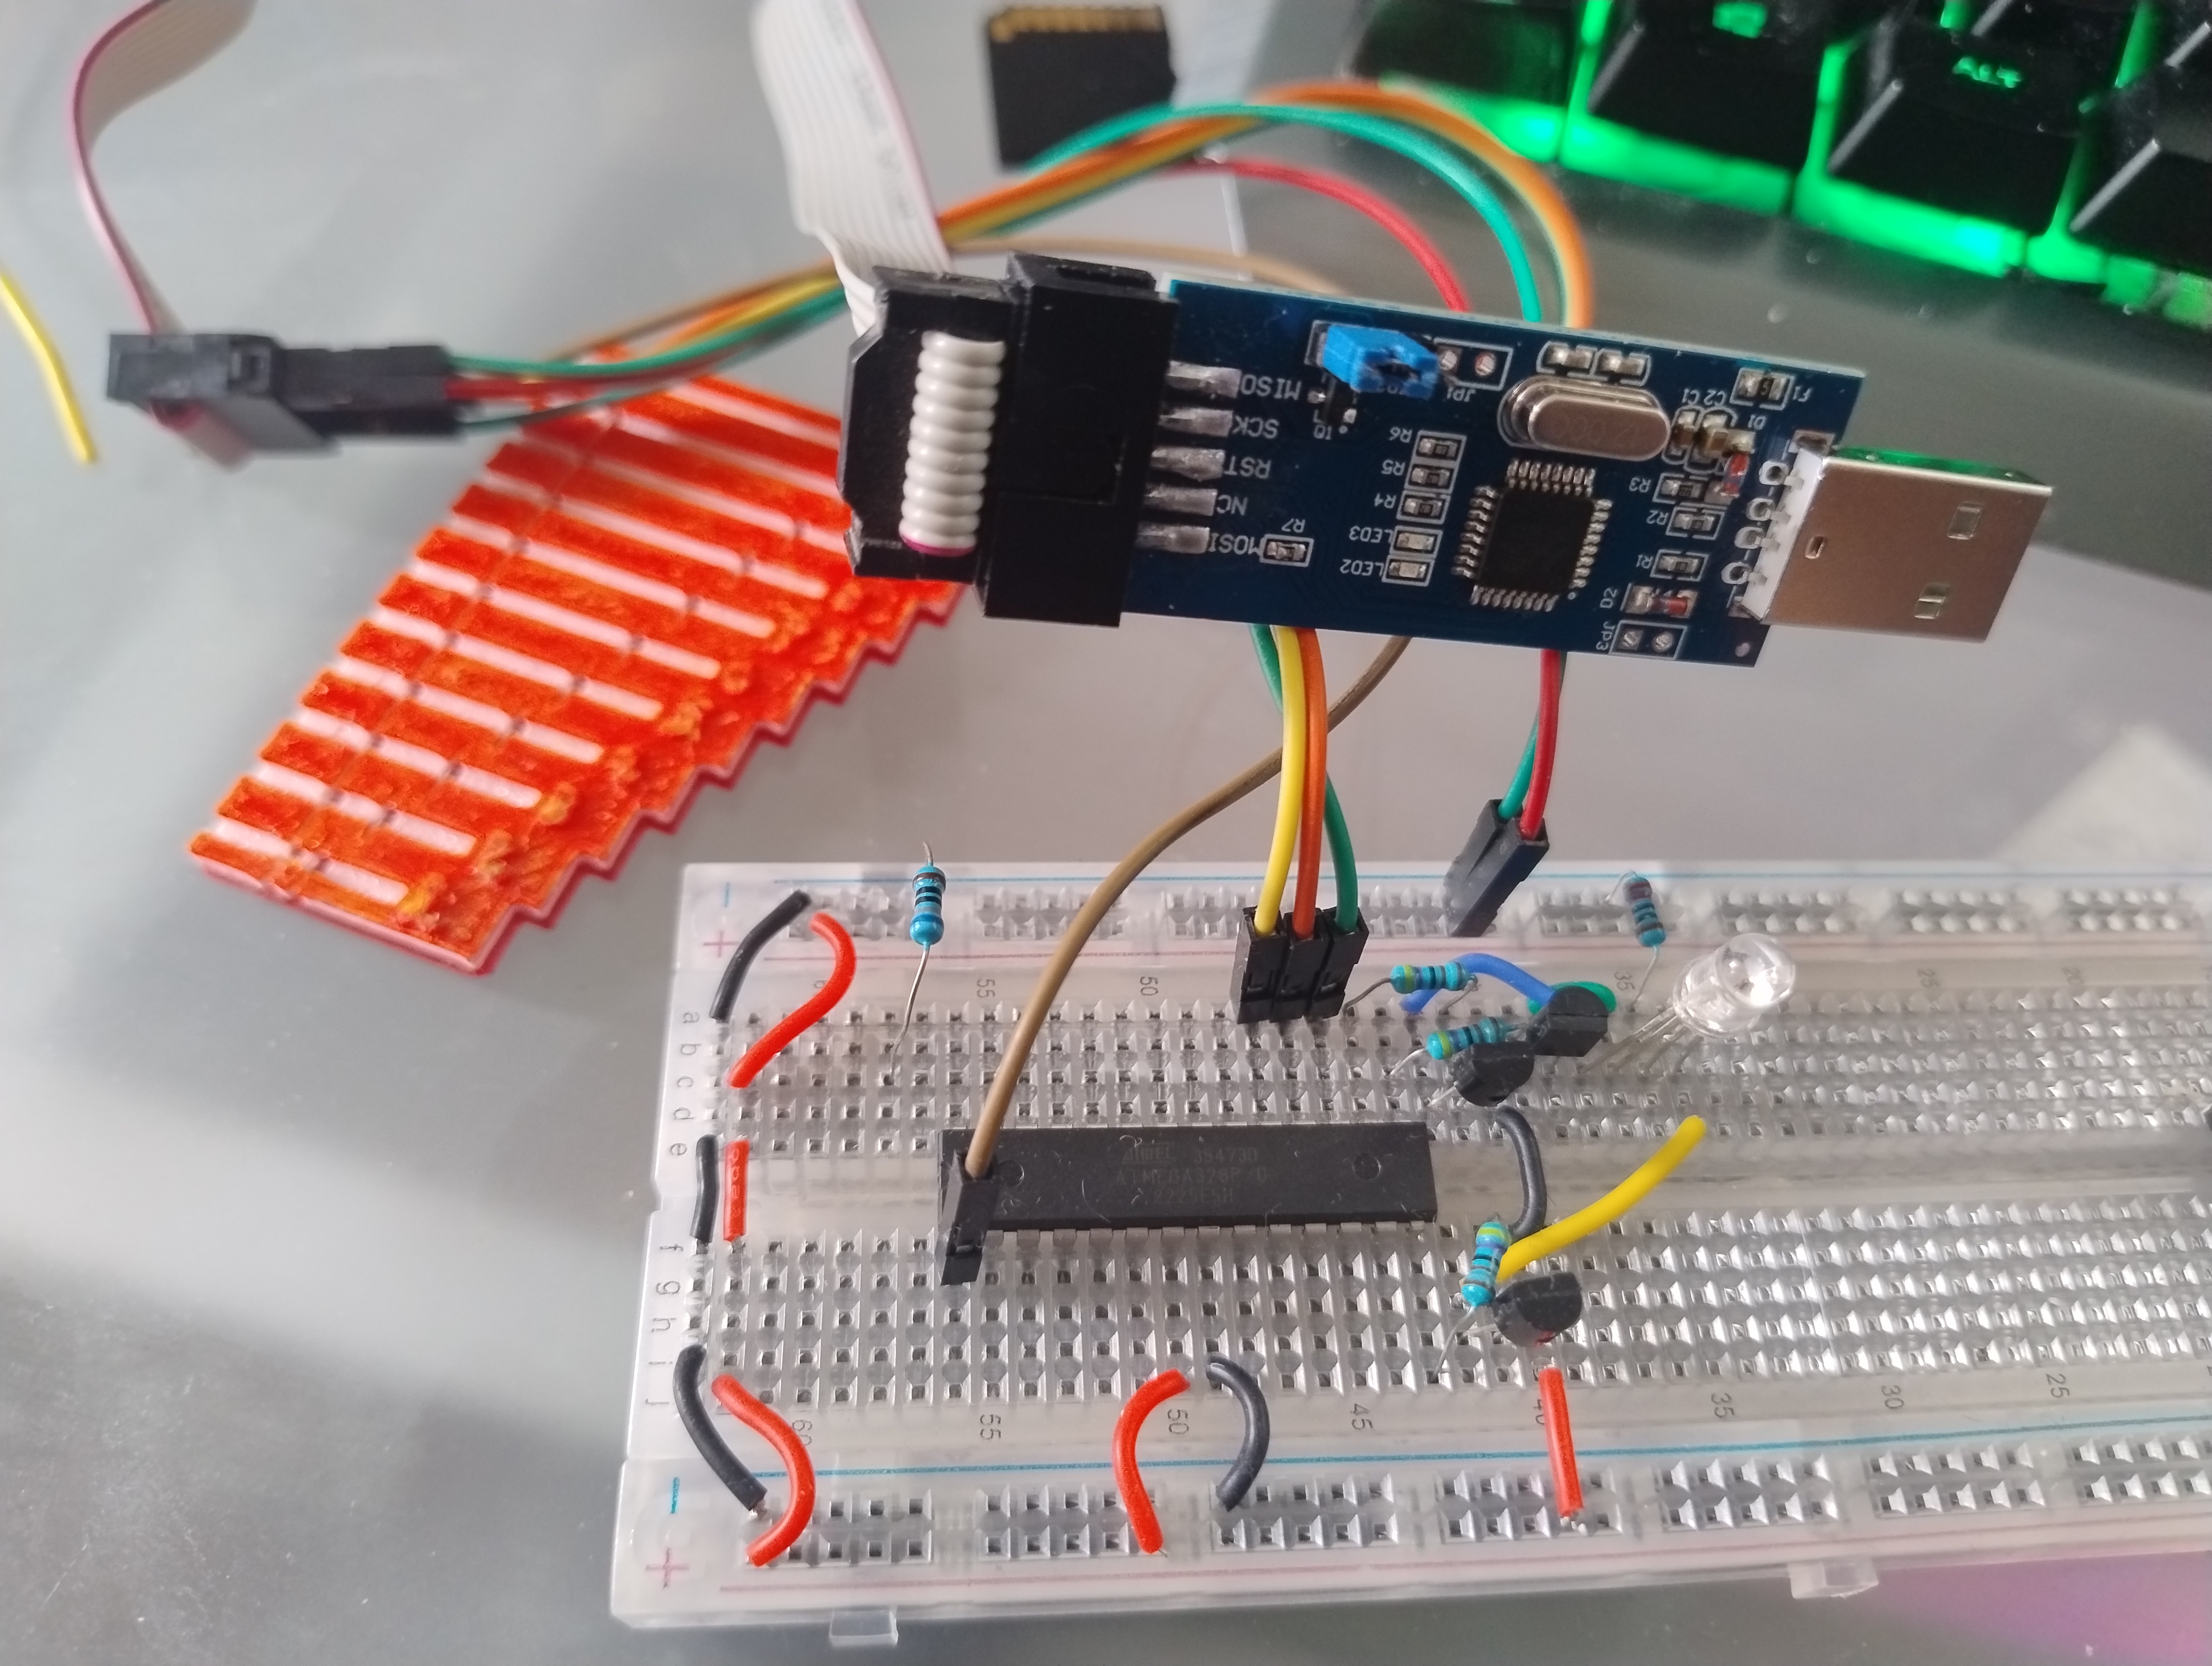
Finally the constructed circuit including the programmer in the real life:
As you can see, PB0, PB1, and PB2 are used to control the RGB LED. The SPI port is connected directly to PB2 (MOSI), PB3 (MISO), PB4 (SCK), and PC6 (RESET). The power source comes from the USB, with the respective GND and VCC (5V).
Create your first program
I did a test code to control a RGB led, this was implemented with a state machine using an struct array.
main.c:
//#define F_CPU 1000000 // Uncomment if you  define F_CPU when you compile with avr-gcc
#include <avr/io.h>
#include <util/delay.h>

void configureGPIO(void);
/*RGBState ENUM:
This values represents the pines in a RGB led with its respective colors R: Red, G: Green, B: Blue and its basic possible combinations:
*/
enum RGBState
{   ALL_OFF = 0, // 000 All LEDs off
    RED,         // 001 Red LED on
    GREEN,       // 010 Green LED on
    RED_GREEN,   // 011 Red and Green LEDs on
    BLUE,        // 100 Blue LED on
    BLUE_RED,    // 101 Blue and Red LEDs on
    BLUE_GREEN,  // 110 Blue and Green LEDs on
    ALL_ON       // 111 All LEDs on
};
/*
LED_states struct contains two unsigned integers with to represents the RGB LED color in an actual state and the next state in a state machine.
*/
typedef struct States{
   uint8_t RGB_color ;
   uint8_t next_state;
} LED_states;

int main(void) {
    /*State machine is the representation of the RGB LED states with its actual state and next state to be set. */
    LED_states states_machine[8] =
    {
        { ALL_OFF, RED},
        { RED, GREEN},
        { GREEN, BLUE},
        { RED_GREEN, BLUE},
        { BLUE, RED},
        { BLUE_RED, BLUE_GREEN},
        { BLUE_GREEN, ALL_ON},
        { ALL_ON, ALL_OFF}
    };
    int state=ALL_OFF;
    configureGPIO();

    while(1)
    {
        PORTB =  states_machine[state].RGB_color;
        state = states_machine[state].next_state;
        _delay_ms(1000);

    }
    return 0;
}

void configureGPIO(void)
{
    //PORTB configured has output
    DDRB = 0x0F;
    // PORTB with all pins in OFF status
    PORTB = 0x00;
}
- Compile the system, in this example only one file was used to this project in this case the build process can be realized with a couple of instructions to create the binaries .elf and .hex:
- Create the .elf file. (F_CPU is a parameter here, Defaulf value is 1MHz)
avr-gcc -mmcu=atmega328p -Wall -Os -DF_CPU=1000000 -o bin/RGB_control.elf main.c - Create the .hex file.
avr-objcopy -j .text -j .data -O ihex bin/RGB_control.elf bin/RGB_control.hex -v
- Create the .elf file. (F_CPU is a parameter here, Defaulf value is 1MHz)
- To Flash to the MCU using avr dude
avrdude -p m328p -c usbasp -P usb -U flash:w:bin/RGB_control.hex
Create a basic Makefile
To automate the process, a Makefile can be created. The following Makefile can be used to implement the last steps:
# Makefile for building and flashing ATMEGA328p

# Variables
MCU=atmega328p
F_CPU=1000000
SRC=main.c
BUILD_DIR=bin
BINARY_NAME=RGB_control
PROGRAMMER=usbasp
PORT=usb

# Compiler and linker flags
CFLAGS=-mmcu=$(MCU) -Wall -Os -DF_CPU=$(F_CPU)
LDFLAGS=

# Rules
all: $(BUILD_DIR)/$(BINARY_NAME).hex

$(BUILD_DIR)/$(BINARY_NAME).elf: $(SRC)
	@mkdir -p $(BUILD_DIR)
	avr-gcc $(CFLAGS) -o $(BUILD_DIR)/$(BINARY_NAME).elf $(SRC)

$(BUILD_DIR)/$(BINARY_NAME).hex: $(BUILD_DIR)/$(BINARY_NAME).elf
	avr-objcopy -j .text -j .data -O ihex $(BUILD_DIR)/$(BINARY_NAME).elf $(BUILD_DIR)/$(BINARY_NAME).hex -v

flash: $(BUILD_DIR)/$(BINARY_NAME).hex
	avrdude -p $(MCU) -c $(PROGRAMMER) -P $(PORT) -U flash:w:$(BUILD_DIR)/$(BINARY_NAME).hex:i -v

clean:
	rm -rf $(BUILD_DIR)

.PHONY: all flash clean
Using visual studio code
A couple of extensions for Visual Studio Code are available:
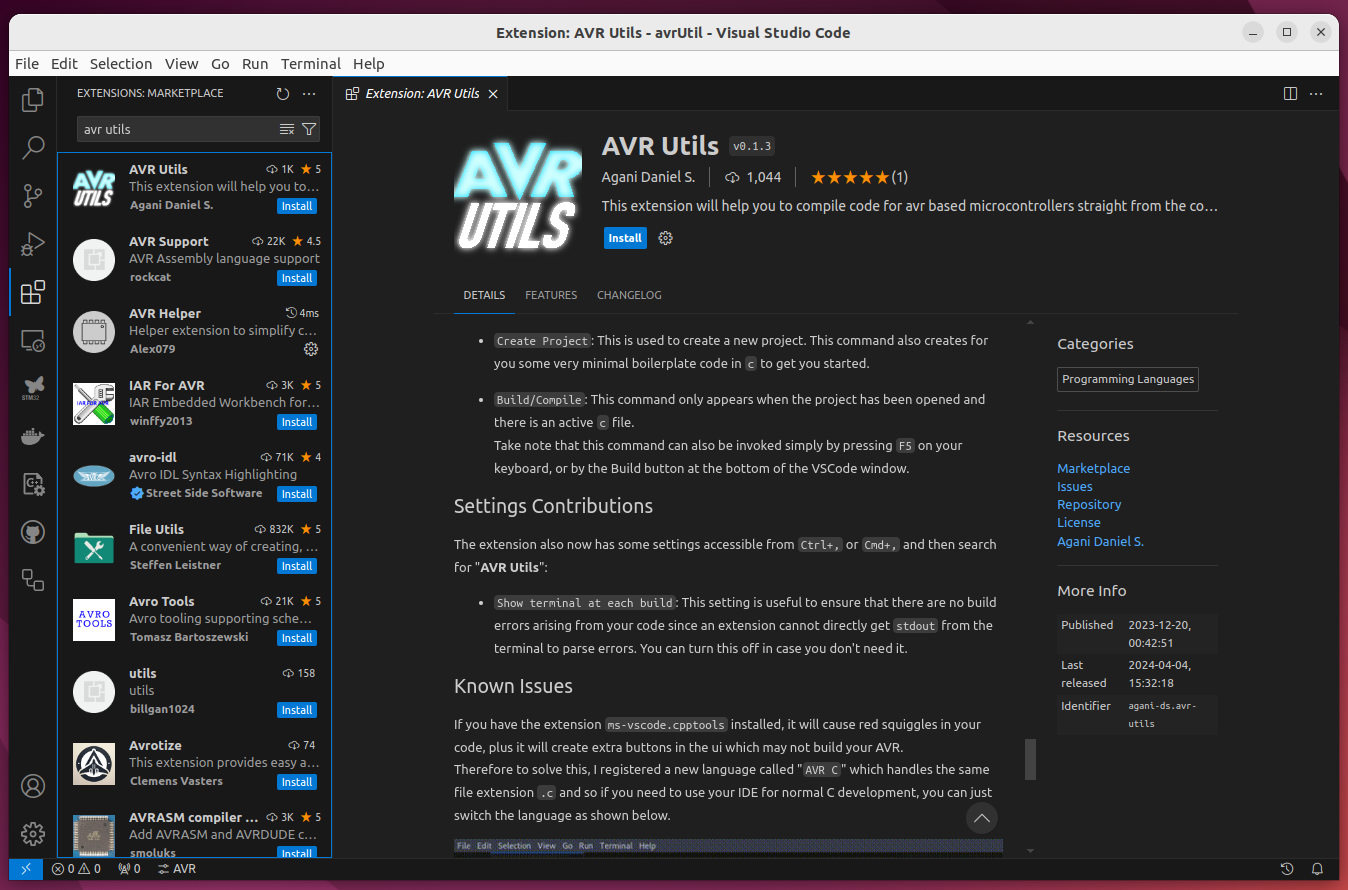
AVR Utils
It is a simple extension that provides a way to compile AVR projects.
-
You can find it in the extensions tab in VS Code.
- To create a project, press Ctrl+Shift+P and select AVR Utils: Make Project. Select/create the directory to work in.
- Enter a name for your project, for example, “avrUtilsTest”. This step will create a new directory, and AVR Utils will create: a main.c file, a .vscode folder with JSON files, and a Debug folder.
- Click in the bottom right part on “Select AVR Device” and select atmega328p.
- Select AVR C Language mode.
- Click on the build icon. If a message saying “No toolchain found” is displayed, it is recommended to select the toolchain provided by Microchip (ATMEL). Download the toolchain, decompress it in your preferred directory, and reference the directory in the extension.
- VS Code can now build AVR projects.
- Use avrdude to flash the binaries to the microcontroller.
Note: Personally, I do not prefer this extension because the compilers are natively integrated into Linux systems, and you can’t flash directly.
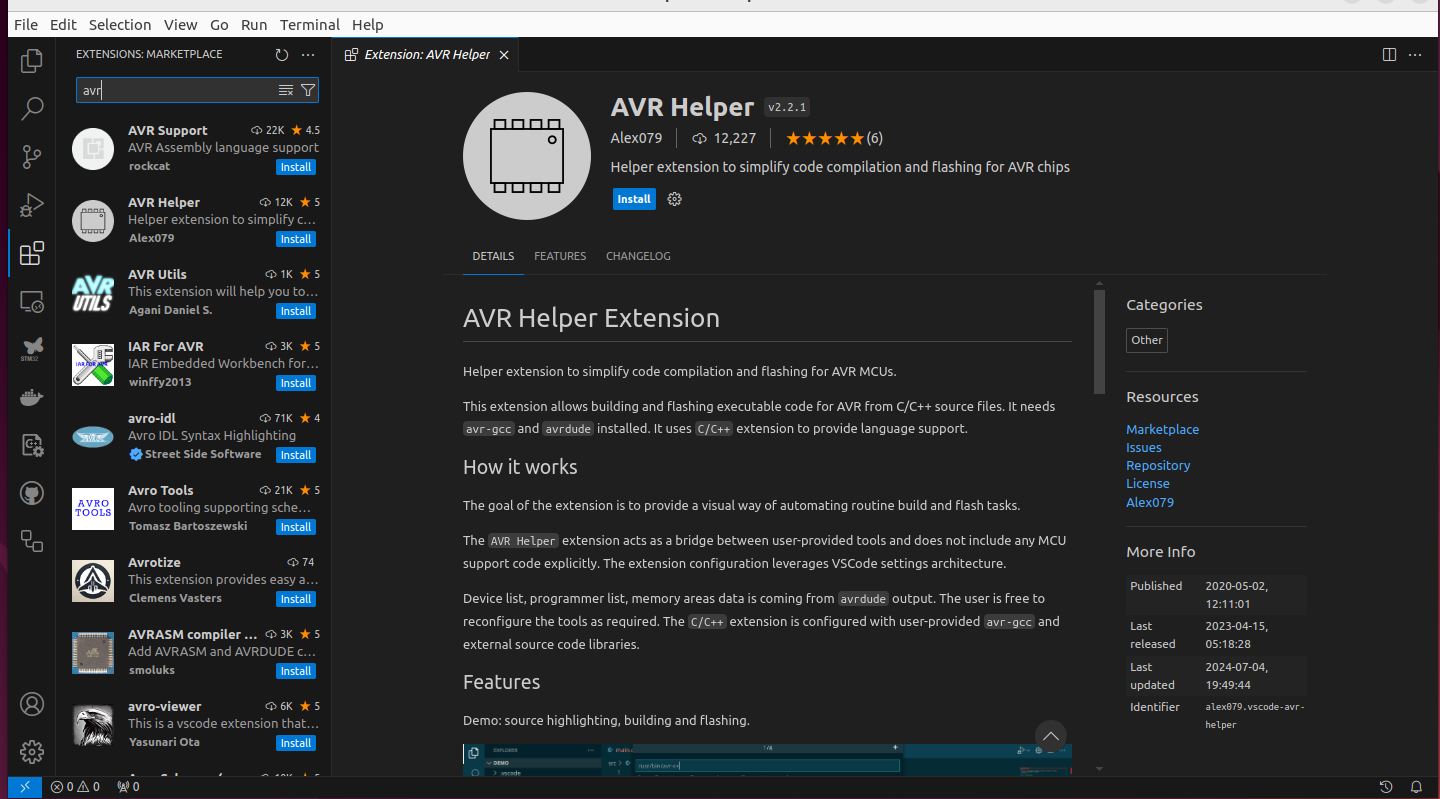
AVR Helper
It is a more complete extension. Follow these steps to install and configure the extension:
- You can find it in the extensions tab in VS Code.
- Press Ctrl+Shift+P and select AVR Helper: Perform initial setup, and press Enter to complete the 4 steps of the extension.
- Write the full path to the compiler executable, usually: /usr/bin/avr-gcc and press enter.
- Write the full path to the programmer executable: /usr/bin/avrdude and press enter.
- Write the full path to the programmer definitions: /etc/avrdude.conf and press enter.
- Leave the source libraries path empty and press enter.
- The next step is configure the programer, press Ctrl+Shift+P and select AVR Helper: Select programmer.
- Select USBasp or your device and press enter.
- Write usb to configure the port and press enter.
- Leave the speed parameter empty and press enter.
- Finally configure the device, press Ctrl+Shift+P and select AVR Helper: Select select device.
- Select atmega328p (or your device) and press enter.
- Write the device frequency in this case 1000000 (1MHz: default value in atmega328p from the factory) and press enter.
- VS Code is now ready to compile and flash a device. The plugin includes three buttons to build and flash:
- Quick: Build and flash with default options.
- Build: Build source code.
- Flash: Flash binary to device.
Conclusion
It is very possible to develop software for AVR microcontrollers using a Linux environment. Do not pay for a Windows license unless it is absolutely necessary! The entire process is summarized in the following video to better explain the steps.